사전 준비
java 17 이상, IDE (IntelliJ or Eclipse) 설치
* Spring Boot 3 ~ 은 JDK 17 이상 사용해야한다.
프로젝트 생성 스프링 부트 스타터 사이트로 이동해서 스프링 프로젝트 생성
Spring Initializr
- Project : Gradle/Maven
필요한 라이브러리를 가져오고 빌드 하는 라이플사이클 까지 도와주는 툴
과거에는 Maven , 요즘 추세는 Gradle 많이 씀
- Spring Boot
SNAPSHOT : 아직 만들고 있는 버전
M2 : 아직 정식 Release 된 버전이 아님
따라서 뒤에 영어가 붙어 있지 않은 정식버전의 최신 버전을 사용하도록 함
- Project Metadata
Group : 도메인
Artifact : 빌드 결과물 (프로젝트명)
- Dependencies
Spring Web : 웹 프로젝트
Thymeleaf : HTML 을 만들어주는 템플릿 엔진 (프리마커 등 다른 엔진을 사용하기도함)
인텔리제이에서 다운받은 프로젝트의 build.gradle 파일을 선택하여 open
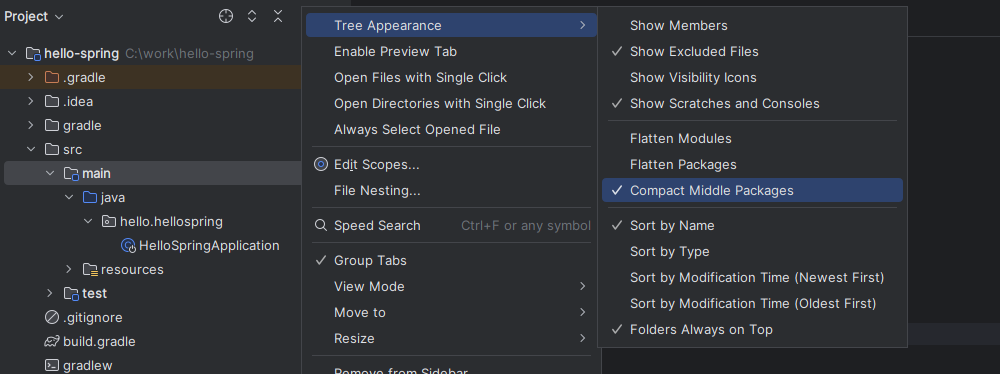
- 프로젝트 구조 잠깐 설명
디렉토리 구조가 이상하게 보인다면 보기 편하게 변경 하기
Compact Middle Packages 선택
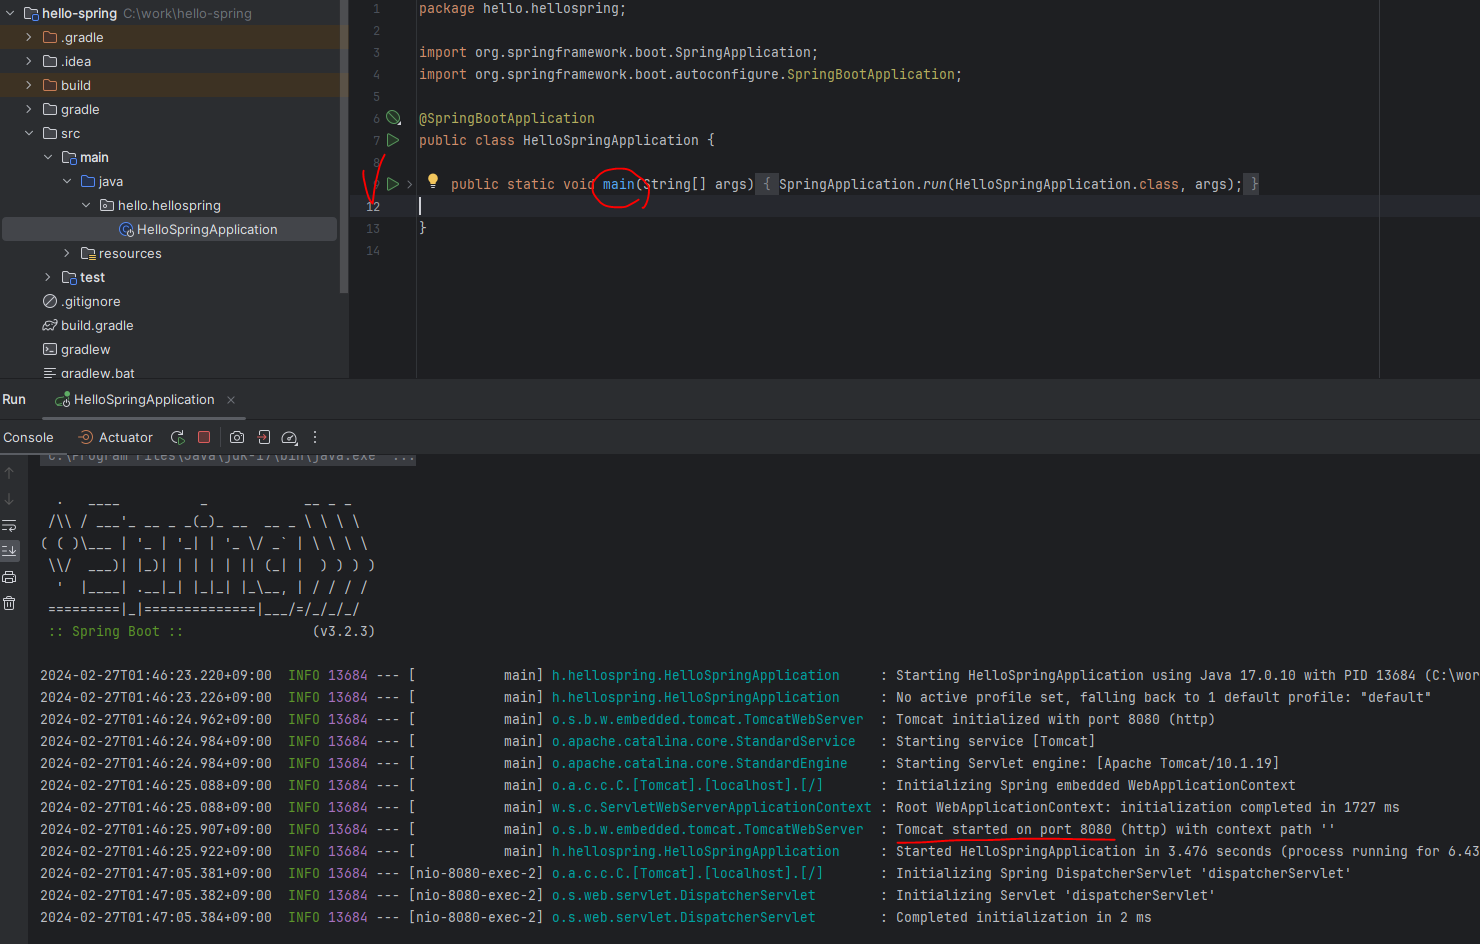
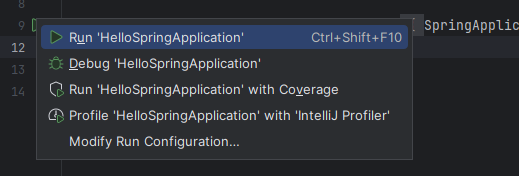
main 함수 run 시킨 후 (스프링 애플리케이션 실행)
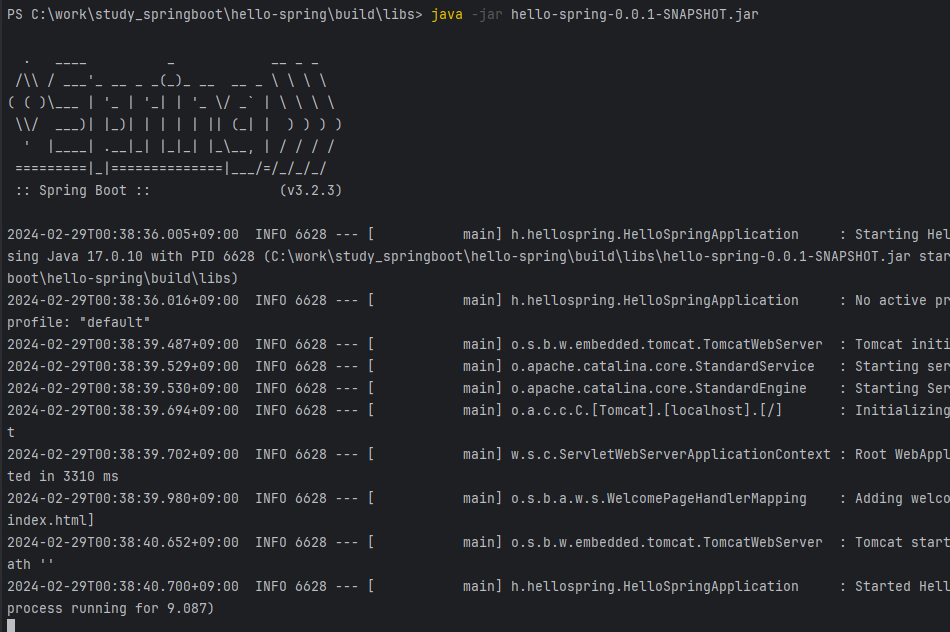
Tomcat started on port 8080 (http) with context path '' 로그 확인
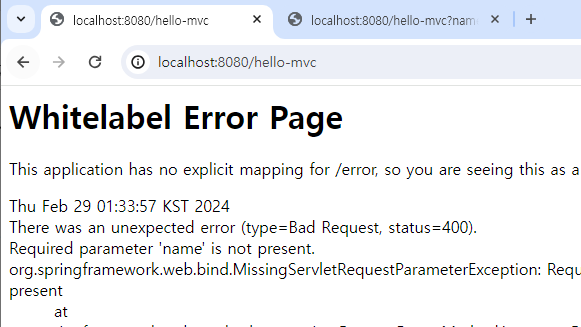
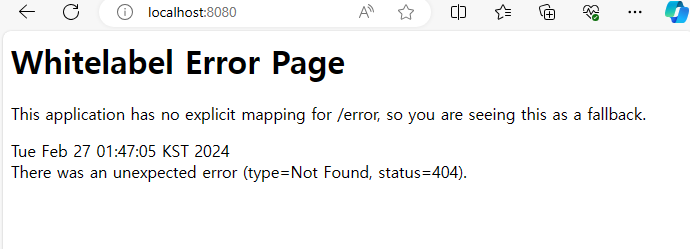
그리고 웹 브라우저 확인 localhost:8080 되면 최초 환경 설정 완료 (에러 페이지 화면 확인)
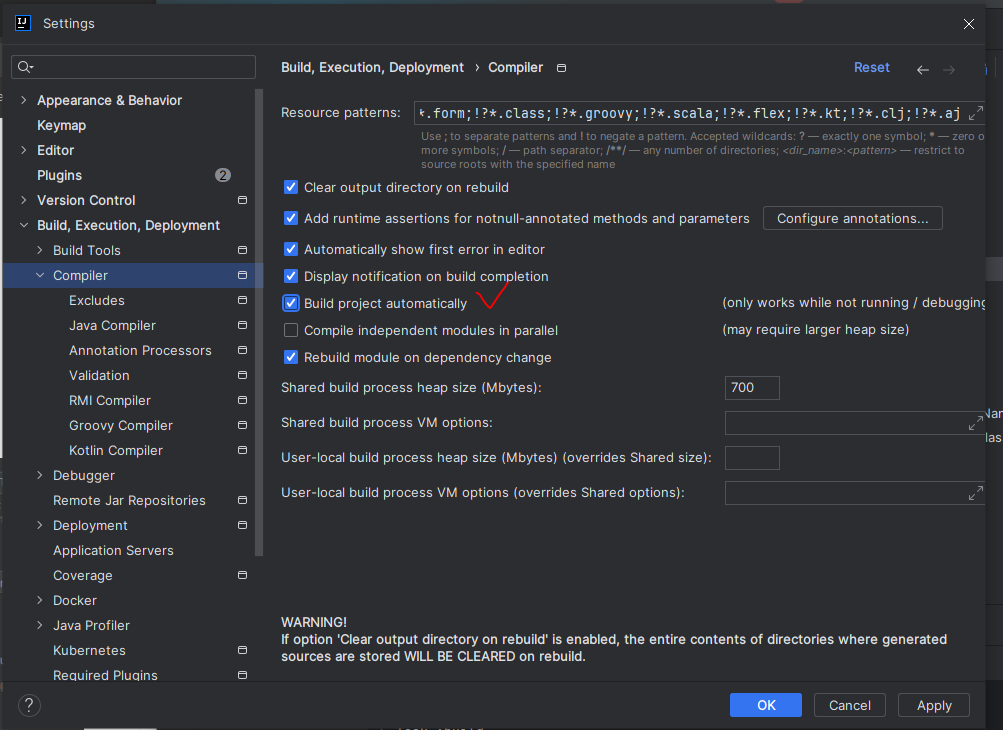
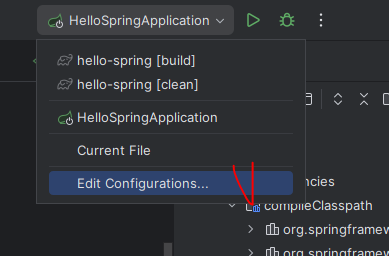
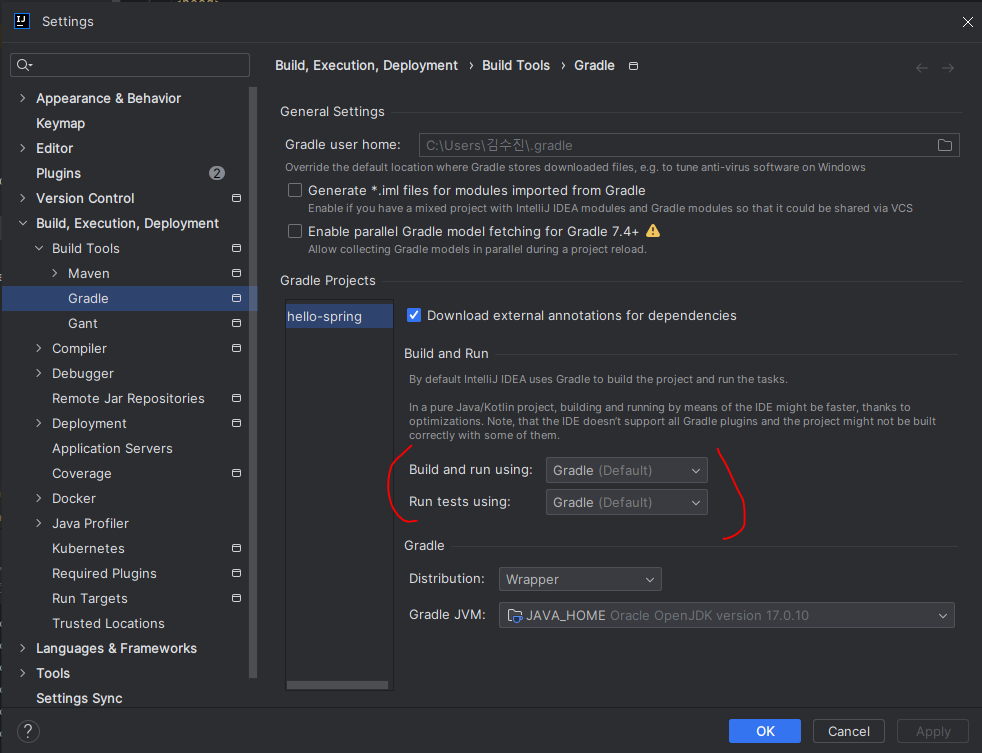
- IntelliJ Gradle 대신에 자바 직접 실행
최근 Intellij 버전은 Gradle을 통해 실행하는 것이 기본 설정이고 이렇게 되면 실행속도가 느림
그럴 경우 두 가지 옵션 변경 해줌, 그러면 gradle 을 통하지 않고 java 를 띄워버려 빠르게 진행됨
윈도우 : File Setting > Build Tools Gradle
Build and run using : IntelliJ IDEA
Run tests using : IntelliJ IDEA
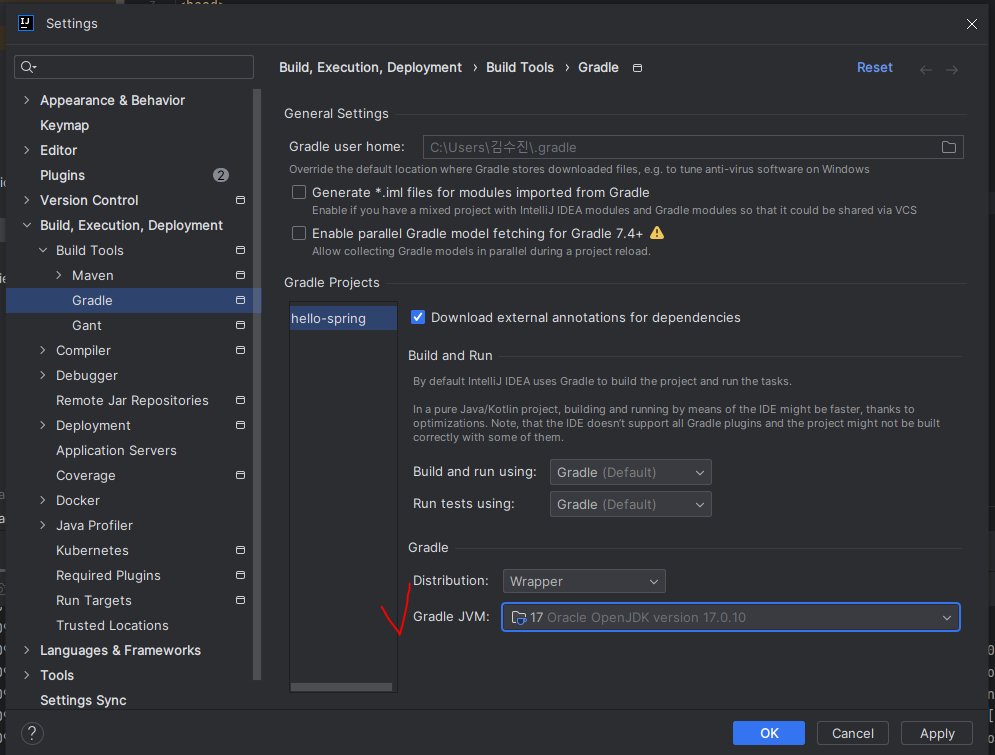
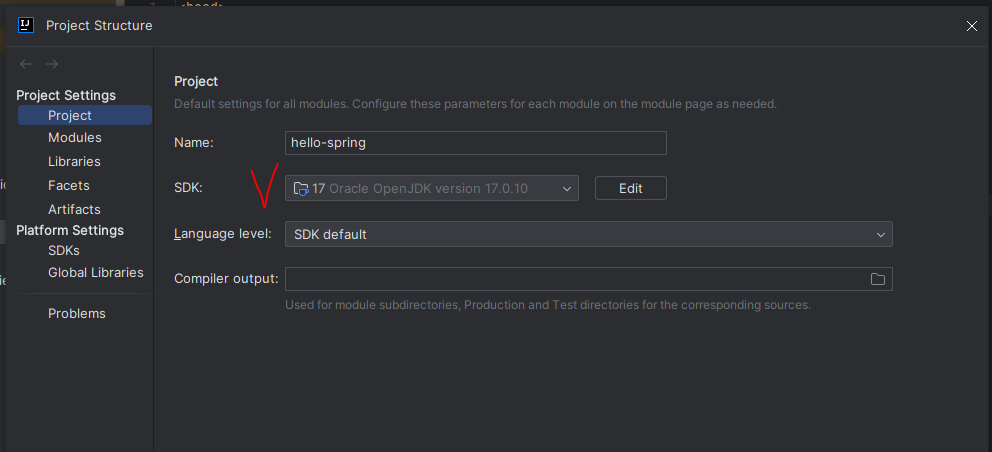
IntelliJ JDK 설치 확인
라이브러리 살펴보기 Gradle은 의존관계가 있는 라이브러리를 함께 다운로드 함
스프링 부트 라이브러리
- spring-boot-starter-web
ㄴspring-boot-starter-tomcat : 톰캣 (웹서버)
ㄴspring-webmvc : 스프링 웹 MVC
- spring-boot-starter(공통) : 스프링 부터 + 스프링 코어 + 로깅
ㄴspring-boot
ㄴㄴspring-core
ㄴspring-boot-starter-logging
ㄴㄴlogback, slf5j
테스트 라이브러리
spring-boot-starter-test
ㄴjunit : 테스트 프레임워크
ㄴ mockito : 목 라이브러리
ㄴ assertj : 테스트 코드를 좀 더 편하게 작성하게 도와주는 라이브러리
ㄴ spring-test : 스프링 통합 테스트 지원
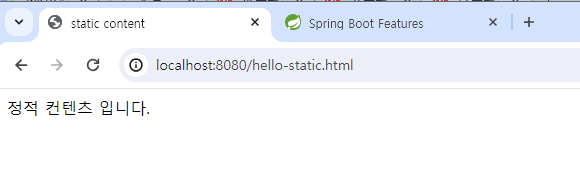
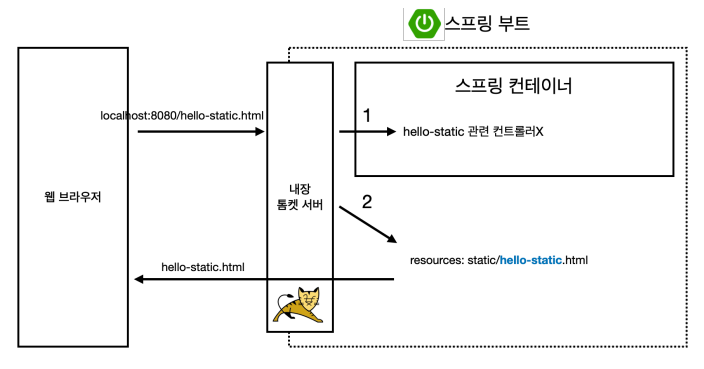
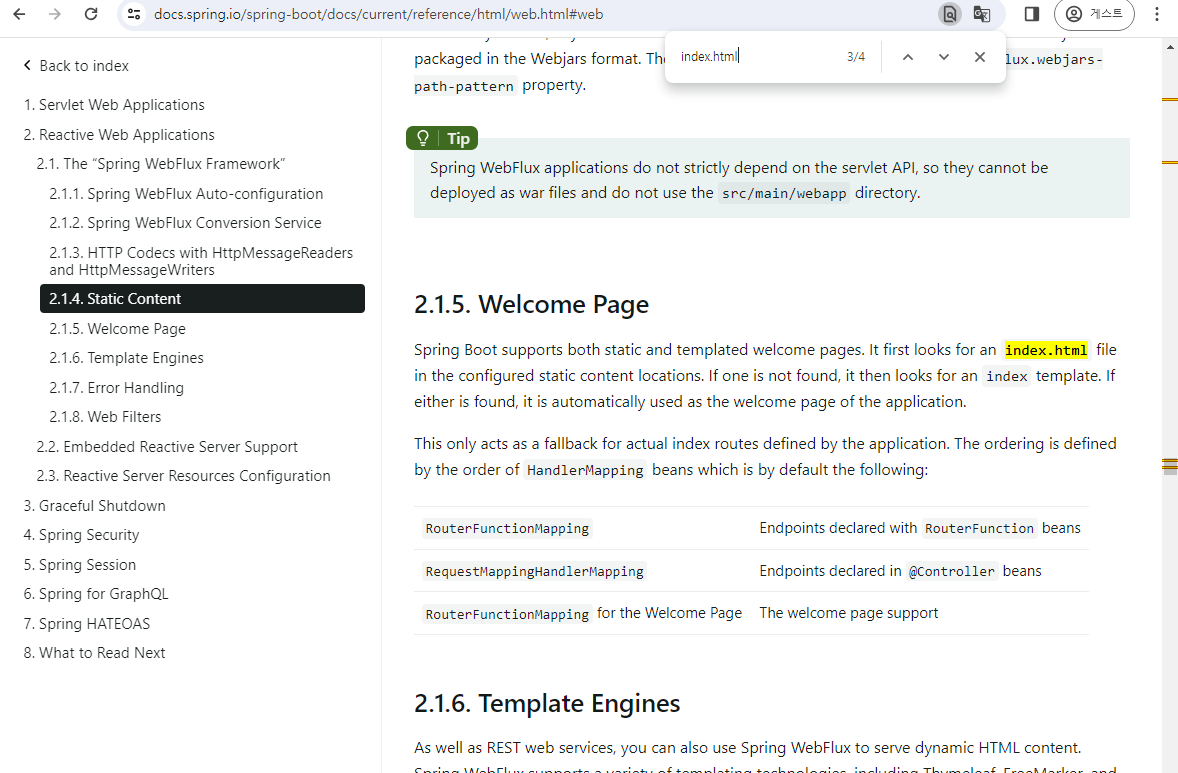
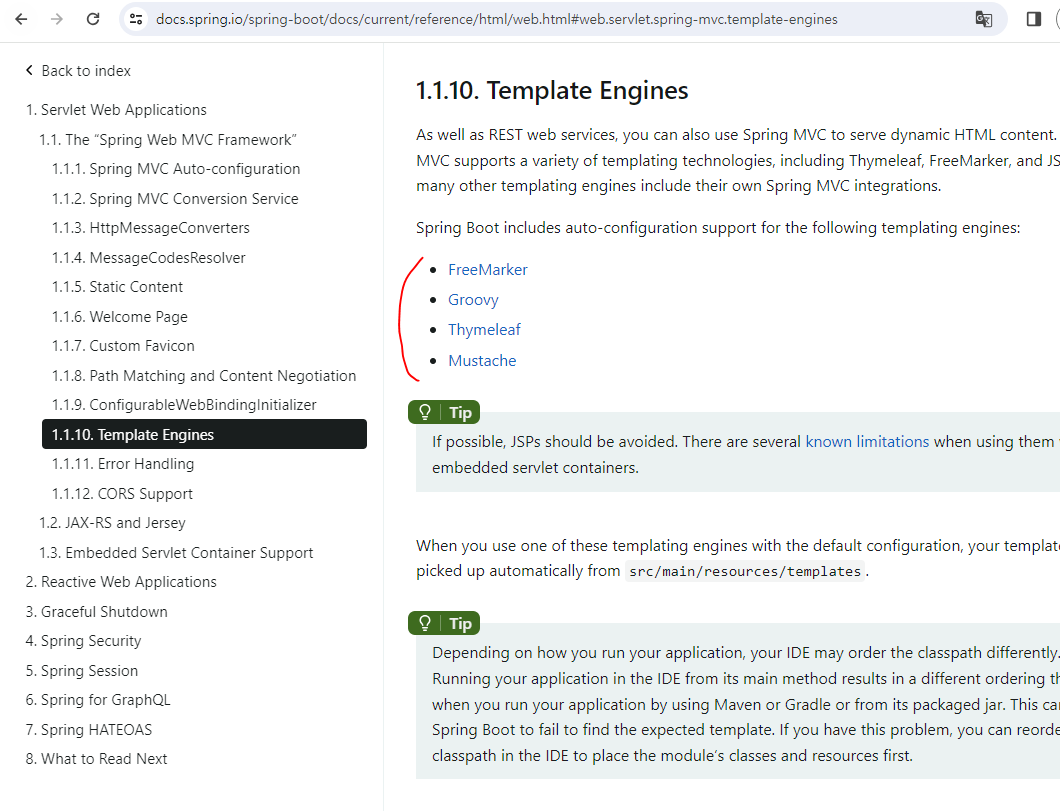
View 환경설정
resources/static/index.html 등록하면 자동으로 웰컴 페이지로 등록됨
(경로에 맞춰 index.html 파일 생성)
스프링 부트가 제공하는 Welcome Page 기능 설명 확인
https://docs.spring.io/spring-boot/docs/current/reference/html/web.html#web
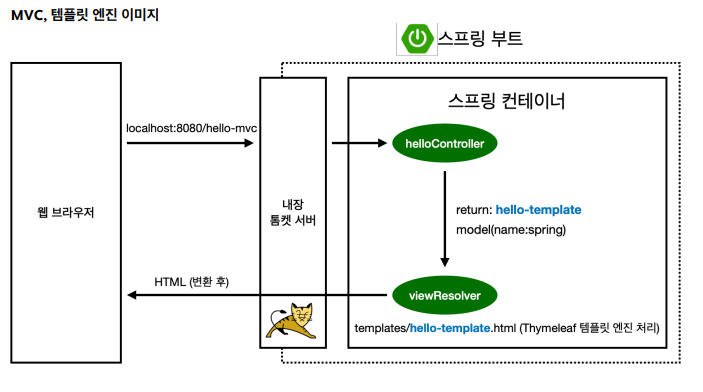
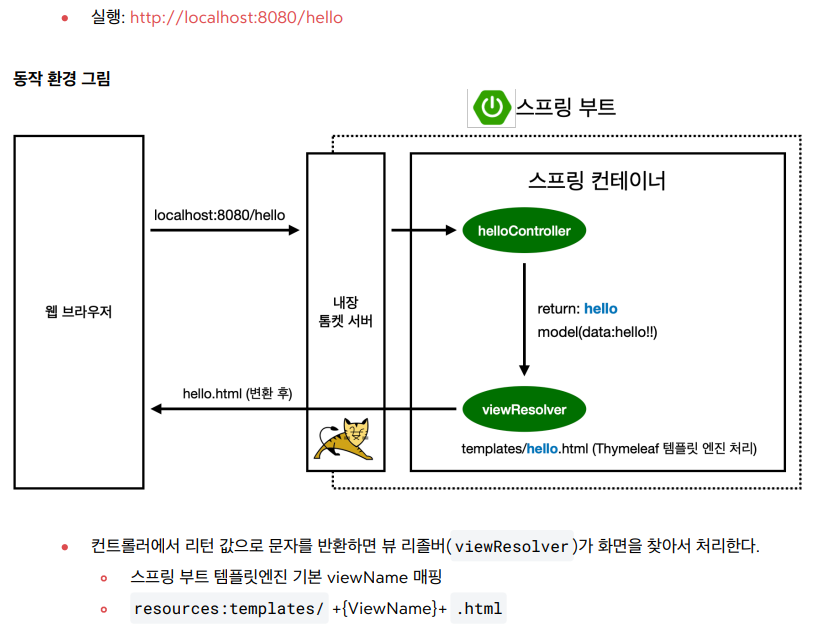
thymeleaf 템플릿 엔진
공식 사이트 : Thymeleaf
스프링 공식 튜토리얼 : Getting Started | Serving Web Content with Spring MVC
스프링 부트 메뉴얼 : Spring Boot Features
Thymeleaf
Integrations galore Eclipse, IntelliJ IDEA, Spring, Play, even the up-and-coming Model-View-Controller API for Java EE 8. Write Thymeleaf in your favourite tools, using your favourite web-development framework. Check out our Ecosystem to see more integrati
www.thymeleaf.org
+ 외에도 사용가능한 템플릿 엔진 문서 확인 가능
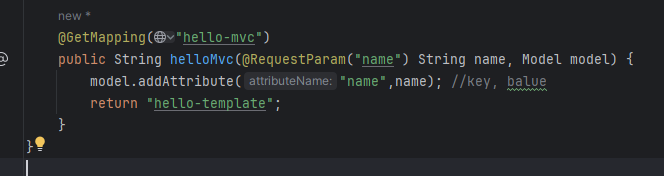
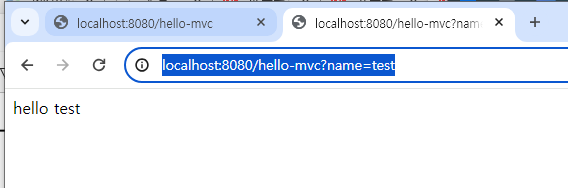
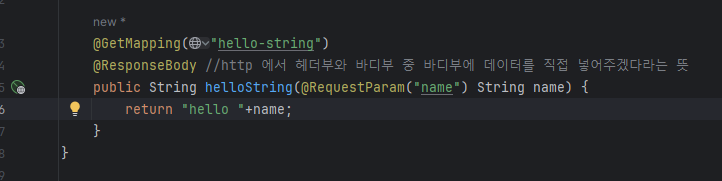
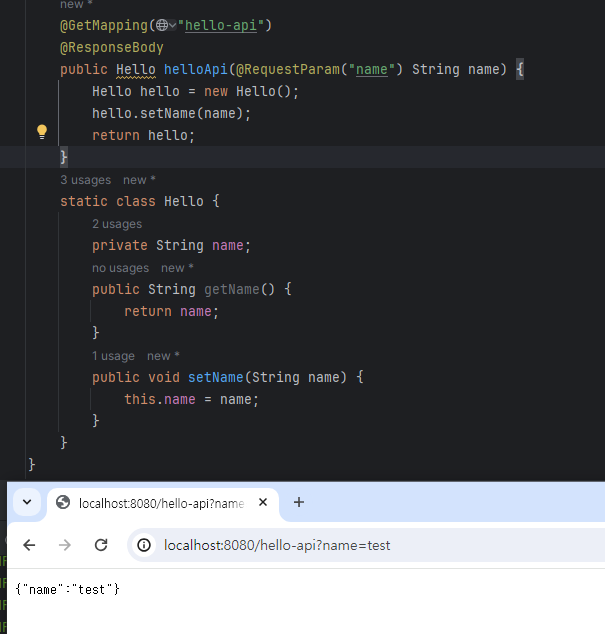
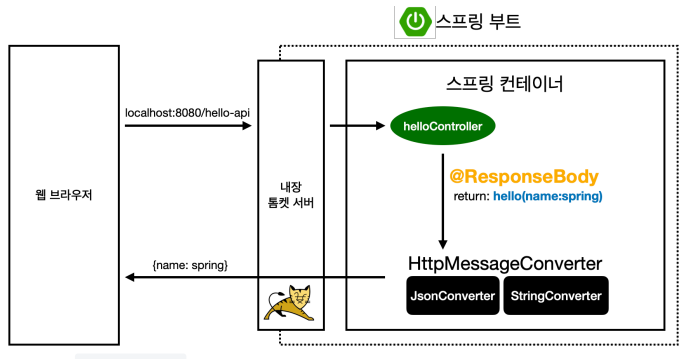
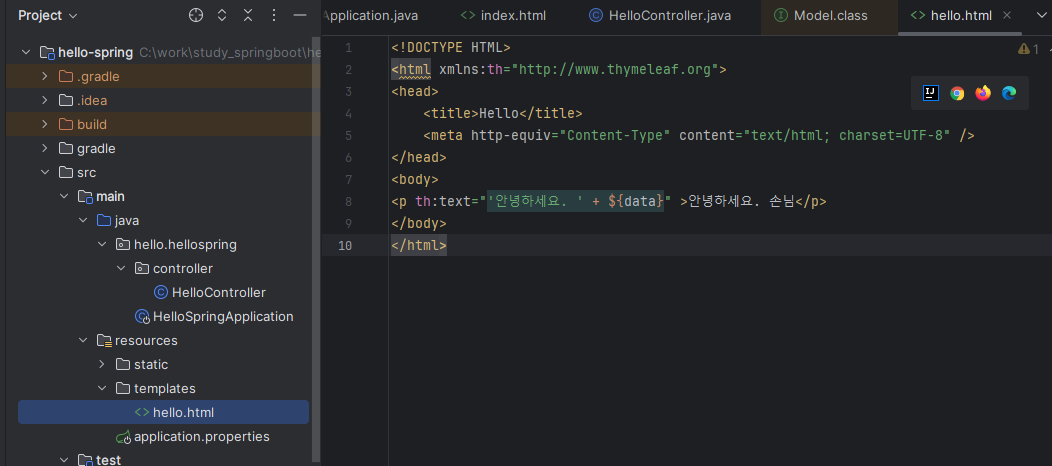
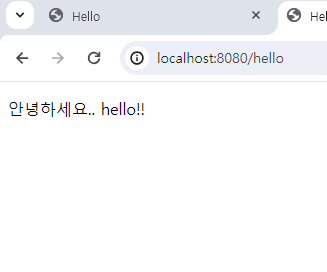
-controller/helloController 추가
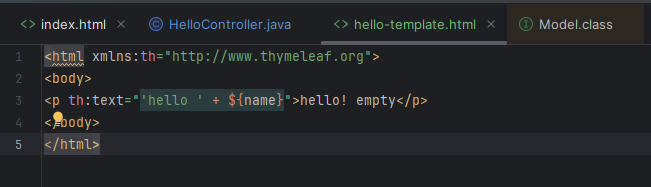
-resources/templates/hello.html 추가
* 참고: spring-boot-devtools 라이브러리를 추가하면, html 파일을 컴파일만 해주면 서버 재시작 없이 View 파일 변경이 가능하다
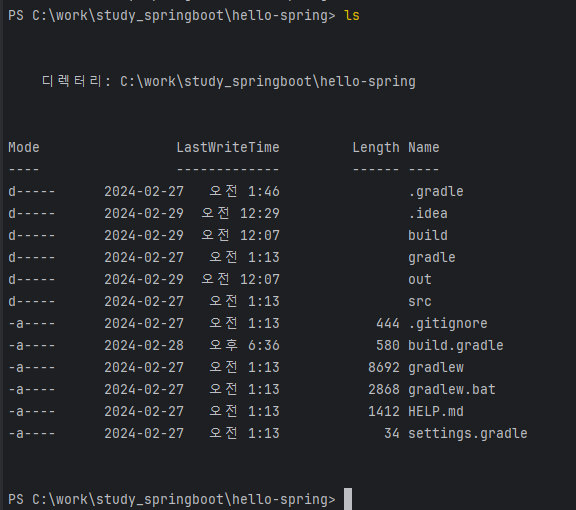
빌드하고 실행하기
윈도우 환경 : cmd
나는 현재 인텔리제이 터미널 위치에서 함.
./gradlw
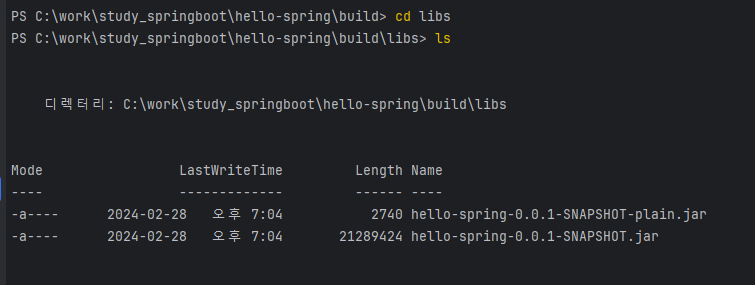
cd build\libs
java -jar hello-spring-0.0.1-SNAPSHOT.jar
./gradlew clean
./gradlew clean build
프로젝트 위치에서 파일 목록 확인
"./gradlw" 명령으로 gradlew.bat 실행 >> gradlew Bduile 완료
빌드 완료 확인 후
"cd build\libs" 으로 이동 후 ~.jar 파일 확인
"java -jar hello-spring-0.0.1-SNAPSHOT.jar" 명령 하면 스프링이 뜨고, 주소 이동시 화면 확인 가능
이렇게 서버를 띄워두면 앱을 동시에 8080 포트를 열 수 없다.
./gradlew clean
하면 build 폴더 자체가 없어짐
잘 안된다면
./gradlew clean build